
Tasks Page
Tasks Page
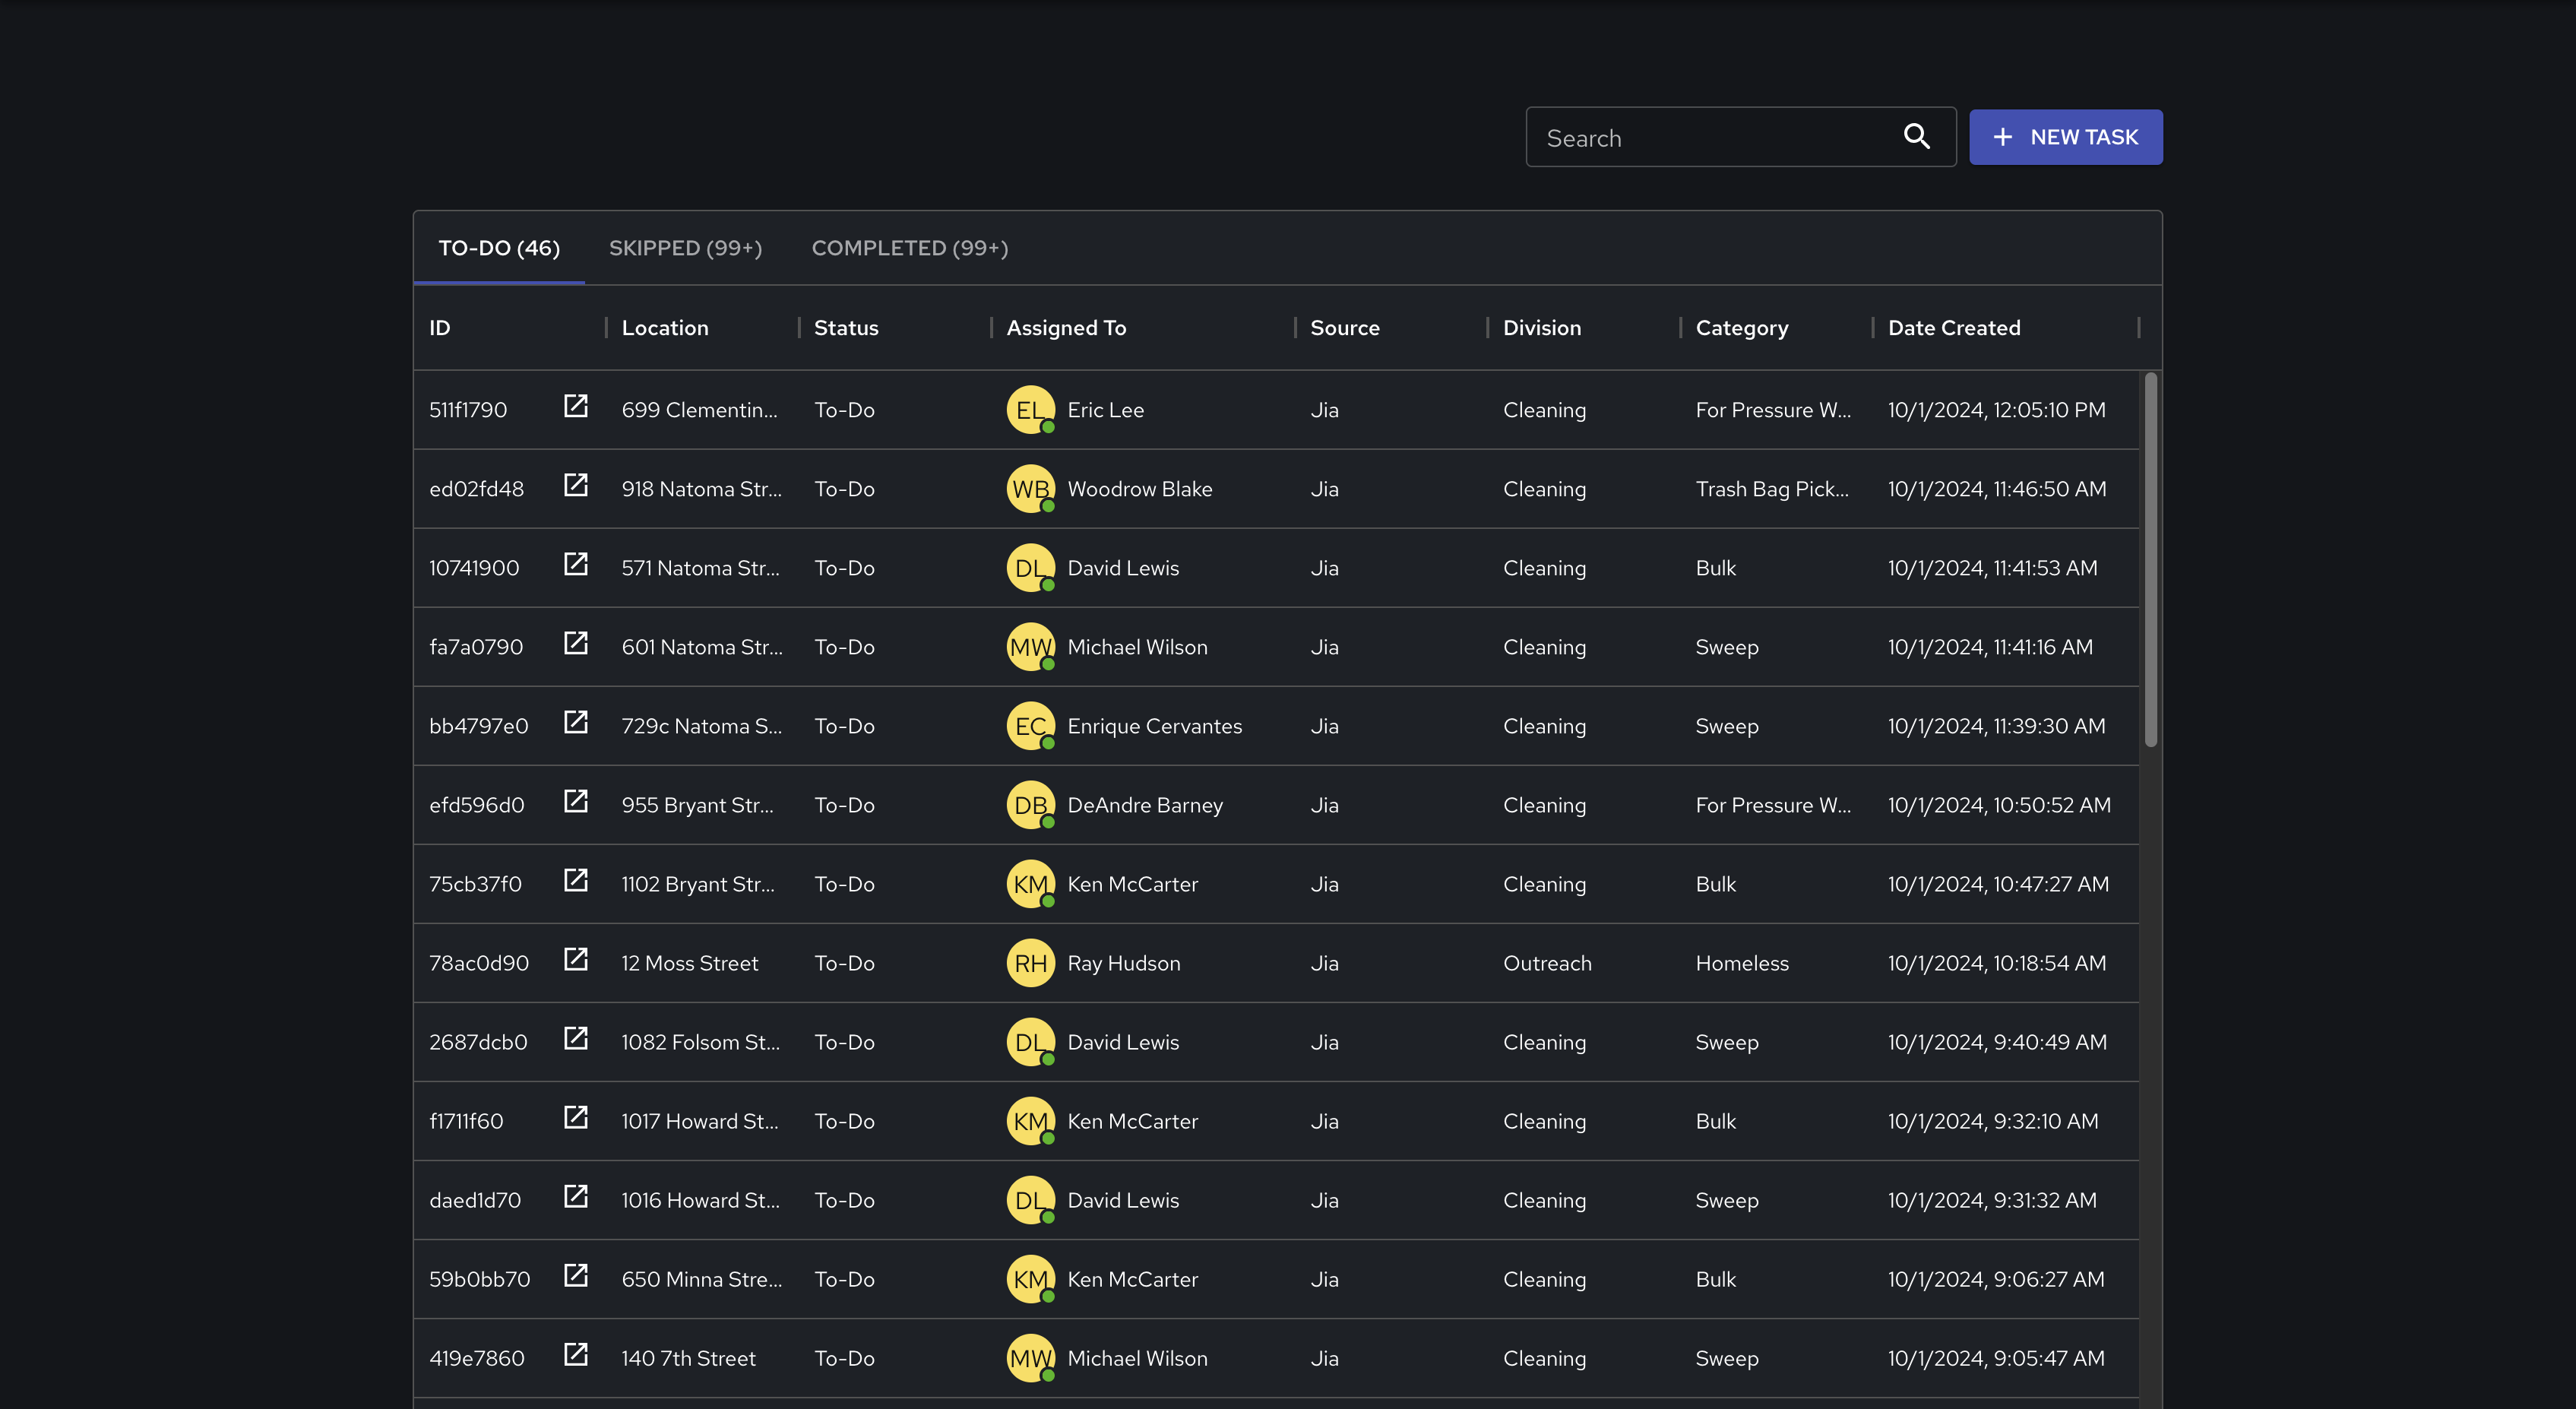
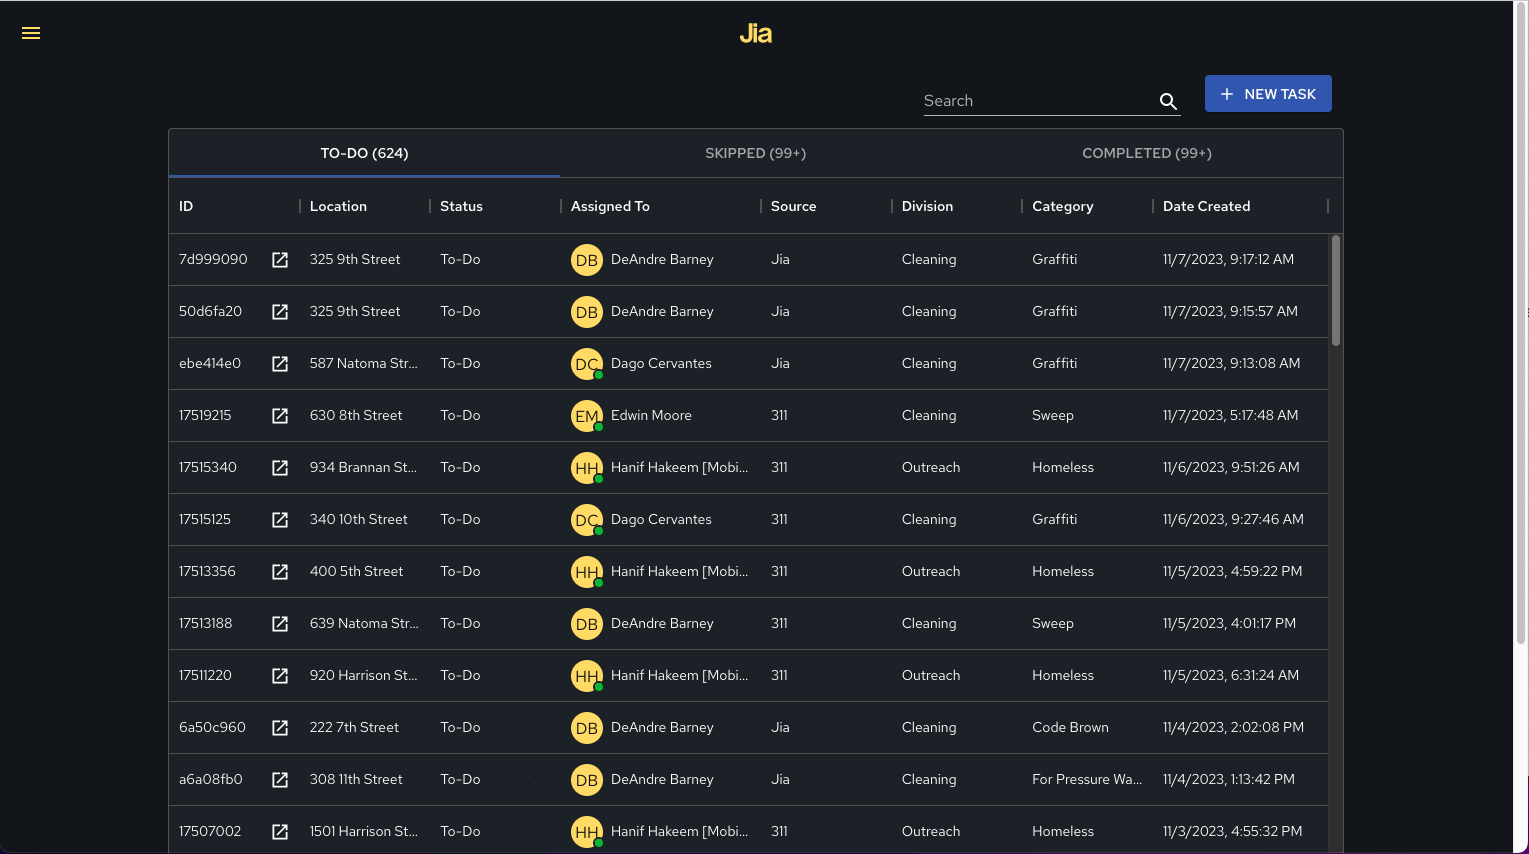
The Tasks page allows you to see and manage task activities in your district for yourself and your team.
The Tasks page contains a table of all of the tasks that have been created by your team.
Task Search
Add a New Task
Task Status
Update Map Styles
Click the “Map Control” icon in the purple icon list located in the upper-right of the Home page. The “Map Control” icon is the first in the list.
Under the “Map Style” drop-down list, select the map style you’d like. The options:
Dark - No Buildings
Light - No Buildings
Dark - With Buildings
Light - With Buildings
Satellite
Classic
https://www.loom.com/share/8cfe46a877654ceeb9e9a6e51a4ae7ec?sid=7a19c1a0-364a-426e-9458-3051eb69930c
Update Tasks Styles
Click the “Map Control” icon in the purple icon list located in the upper-right of the Home page. The “Map Control” icon is the first in the list.
Under the “Task Style” drop-down list, select the task style you’d like. The Options:
Scatter - shows a single dot on the map for each task.
2D Heatmap - shows a 2D map in which colors represent the frequency of tasks in a given location (blue = few, red = many).
3D Heatmap - shows a 3D map in which the height of the bars represent the frequency of tasks in a given location (low = few, high = many).
Create a Task
Click the “New Task” button in the upper-right of the table. You will now be in the “Add New Task” screen.
Search for an address or tas
You can also click a specific fixed asset to create a task for that fixed asset.
Select a Division and Category for the task you’d like to complete along with any notes you’d like to add for the ambassador taking care of the task.
Click the green check mark to create the task.
Assign a Task
Navigate to the task you would like to assign in the Tasks table.
Under the “Assigned To” column, click the current assignment status for the task. This will either be “Unassigned”, or have the name of the individual the task is assigned to.
Type the name of the employee to whom you would like to assign the task.
Edit a Task
Navigate to the task you would like to edit in the Tasks table.
Click the Task ID to open the task. You should now be on the Task Details view.
Click the pencil icon next to the task to edit the task.
Adjust the details of the task.
Click the green check mark to confirm your changes.
Change Task Status
Navigate to the task you would like to complete in the Tasks table.
Note that the task may appear under the “Skipped” or “Completed” areas of the Tasks table.
Click the status of the task you would like to complete. This will appear in the “status” column.
Select the status to which you would like to change the task. This will either be “To-Do”, “Skipped”, or “Completed”.
Filter Tasks
Navigate to the top row of the Tasks table.
As you hover over the column you would like to filter, you will see three vertical dots on the right of the column header. The columns that can be filtered are:
Source
Division
Category
Date Created
Date Skipped
Click the “filter” option in the menu. Here, you can select the columns, operators, and values for which you’d like to filter. Press enter to update the table filters.
For example, to filter tasks to the “Cleaning” division, we will select
“Division” under the “column” drop-down,
“Contains” under the “operator” drop-down, and
“Cleaning” under the “Value” drop-down.
Filter tasks by User
Navigate to the Search box next to the “New Task” button.
Type the user whose tasks you’d like to view and press enter to filter the table to that user’s tasks.
Task Search
Navigate to the Search box next to the “New Task” button.
Here, you can search to filter the Tasks table to any tasks that match the criteria indicated in the search box. This includes:
TaskID
Status
Source
Division
Category
Date Created
Date Skipped